WHAT IS GOANIMATE?
GoAnimate is a content development tool used for creating explainer videos and animations. It is cloud-based, meaning no download or setup time is required, and the hard drive space on computer will not be consumed. The tool is readily available for use with proper internet connection.

GoAnimate has great flexibility, allowing users to create engaging contents such as the following:
-
Character- Based Animation
-
Animated Explainer Video
-
Animated Infographics
-
Whiteboard Animations
GoAnimate offers easy-to-use, drag-and-drop templates to users of different skills level. Each element on the template is also customizable to fit the needs of businesses and educational institutions.
USING GOANIMATE FOR E- LEARNING
As suggested by Boettcher & Conrad (2016), video and animation explainer tool has below pedagogical uses and purposes in Course Beginnings (CB) and Early Middle (EM) of an online course:
-
Create a media-rich learning environment to provide variety, choice, and depth of processing opportunities
-
Create audio or video announcements, short mini-lectures, or concept introductions
-
Introduces core concepts, demonstrating processes, showing examples
In Late Middle (LM) and Closing Week (CW), the tool can help learners apply and engage in more rigorous exploration of core concepts:
-
Manipulate animations or videos to develop a visual representation of students’ developing knowledge by showing integration of new with existing knowledge
As a result, GoAnimate’s easy-to-use feature and user interface provides opportunity to improve and strengthen learner engagement in e-learning. Founder of eLearn Hub, Rebecca Ogrady-Marshall, has shared her insights:
“Animated video is a great way to incorporate storytelling scenarios, exaggerate points and bring a scene to life. It can be used to demonstrate an idea and also to take the learning into a ‘different world’. Animated video also gives the opportunity for the learner to watch before taking part in an activity”
HOW TO GET GOANIMATE?
Accessing to GoAnimate is easy! Because it is a cloud-based system, you can get this tool when there is a reliable internet without any external hard drive disk or CD-ROM drive!
-
Go to GoAnimate’s website https://goanimate.com
-
Fill in your information on “Sign Up for A Free Trial” form on the right-hand side of home page. Before fully purchasing any plans, new users receive 14 days of free trial.

HOW TO CREATE AN ANIMATED VIDEO?
A. RECOMMENDED STEPS BEFORE JUMPING IN
Step 1 Determine your needs
Determine your needs prior to video-making will facilitate the process and eliminate frustration from users who are completely new to this tool. Simply write down answers on a piece of paper.
-
What is your message, what material do you need to cover?
-
Who are you targeting?
-
What do you want them to do?
-
Where will my video be played and in what context?
-
How will I measure success?
Step 2 Create a content outline
Outline your content and think about:
-
What situations could occur to help you bring your main points forward?
-
Who are your characters? How do they look like?
-
Where are the locations in the videos?
-
What are the props?
-
What happens to the characters/locations/props over the course of the video?
-
How can you use their experience to educate your audience or drive them to action?
B. USING GOANIMATE TO CREATE
After you have a creative brief or content outlined, you can then move on to the next stage!
THEME STYLES
-
After logging in, click the orange button “Make a Video” on the top right corner.
-
Based on your needs, select a desired style from following options: Business Friendly, White board Animation, Video Infographics, Common Craft, or Import Your PowerPoint. In this step-by-step guide, Whiteboard Animation is used for little demo.


CREATING YOUR FIRST VIDEO
-
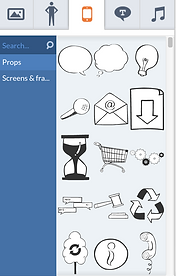
Once your theme is selected, you will then be directed to the work area. On the left side, you will find 1) the drag and drop backgrounds, 2) characters, 3) props, and tools for adding 4) text, and 5) sound effects and music. The stage for the animation is the main window.


-
Beneath the main window is the timeline for adding scenes. To add a new scene, click the + sign at the end of the timeline.

-
When you select a character or object, a small tool box will display above. This provides a set of quick options to 1) swap the asset, 2) add movement, 3) flip it, 4) move it forward and 5) backward, or 6) delete the element. On the left side, some wider options are also available for the selected element. For example, image 2, the selected character has been replaced with one of the wider action options, under medical -doctor section.


-
Once you finish designing a particular scene, you can then add a dialogue or voice. There are four ways to add dialogues:
-
1) Mic Recording
-
2)Upload File
-
From your own computer
-
Files must be in MP3. WAV, M4A format
-
-
3)Your Library
-
On GoAnimate cloud system, available only with paid membership
-
-
4)Text-To-Speech
-
You can type in a limit of 180 characters for the dialogue.
-
Choice of female or male voice, different languages, and different speaker voices
-
-


SAVING AND EXPORTING
-
There are settings available for making your video private or public. You can export to YouTube and other video sites and embed in Facebook, LinkedIn and other sites. The conversion process can take a while, particularly for larger videos. GoAnimate will notify you by email when the video is ready.

ADVANTAGES AND DISADVANTAGES
ADVANTAGES
-
Supports learning outcomes
-
Provides visual learning support on core concepts, or more in-depth demonstration of “real world” scenario through animated characters and props, then following up with class activities or assignments.
-
-
Ease of use
-
Easy to use drag and drop feature, allowing users of little or none experience with animation and design to skip an arduous learning curve.
-
-
Accessibility
-
It is a cloud-based system. The tool can be accessed anytime and anywhere when there is internet availability. It will not be restricted by specific operating system.
-
-
Flexibility
-
A wide selection of templates, characters, plots, dialogue addition provides great support in creating a highly polished video.
-
DISADVANTAGES
-
Access limited by paid membership
-
GoAnimate only provides a 14-day free trial. After that the users will need to pay for monthly subscriptions that runs from US$39 per month for Basic Plan, US$89 per month for Premium Plan, and $259 per month for Team Plan. Such pricing may not be a good investment for educators who do not use videos as a frequent content tool.
-
-
Unstable compatibility
-
GoAnimate tends to work less effectively on Safari browser, in which users may experience lagging and nonresponsive interface. The tool works better on Google Chrome.
-